Official call-quality checks
Video platforms adapt quality to the network, but their support docs still show why upload, stability, and meeting type matter.
Pre-arrival checks
Before a critical call
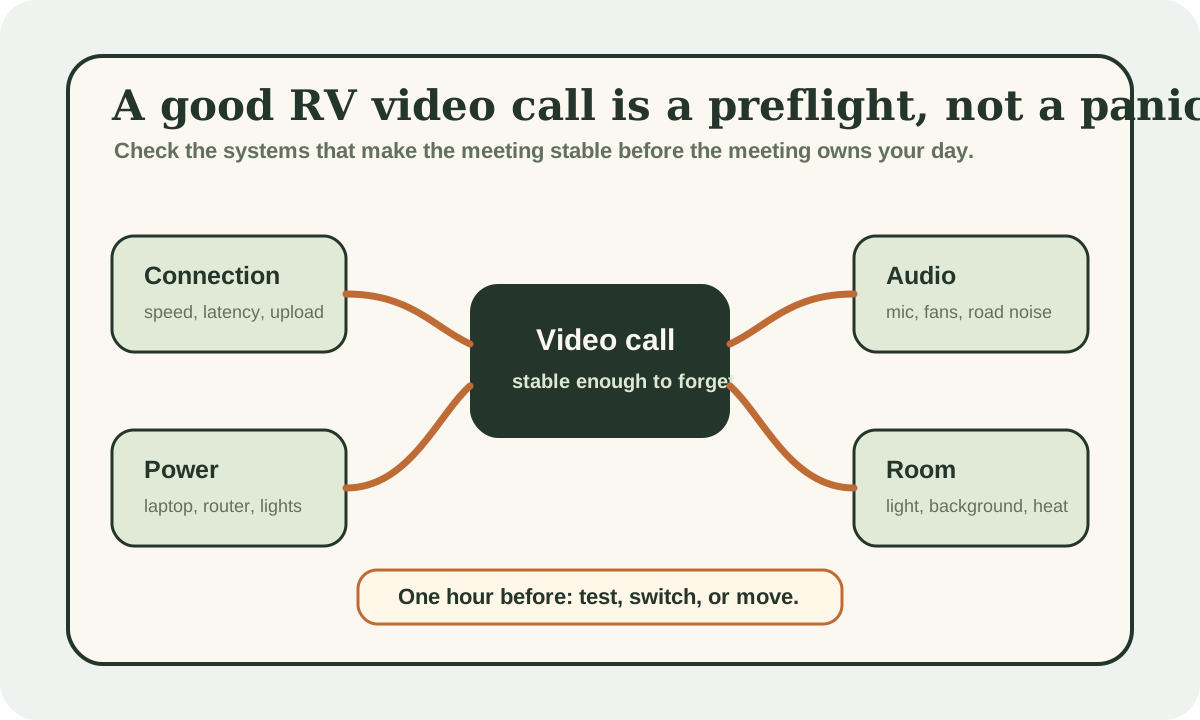
Test the primary connection, name the backup, confirm battery margin, set audio and light, and move early if the campsite is failing.
A good call setup is mostly about predictability
People often reduce RV video calls to one question:
"Is the internet fast enough?"
That is too narrow.
A good call needs:
- stable download and upload
- tolerable latency
- enough data for the meeting block
- power for laptop, router, dish, lights, and fans
- clear audio
- a non-chaotic background
- a fallback decision before the meeting starts
The goal is not a perfect studio. The goal is a work block that does not feel improvised every time the calendar pings.
Match the setup to the call type
Compare
RV video-call setup by meeting type
Use one comparison matrix to scan the practical differences. Small screens stack each row; wider screens keep the first column pinned.
| Spec | Short internal check-in | Client or interview call | Long presentation or workshop |
|---|---|---|---|
| Connection margin | Moderate; audio fallback may be fine | High; test upload and stability first | Very high; use primary plus backup plan |
| Power plan | Laptop charged before the call | Battery and internet gear confirmed | Work block planned as a full load event |
| Audio priority | Quiet enough, headset helpful | Dedicated mic or headset strongly preferred | Noise sources managed before start |
| Fallback trigger | Switch if video fails twice | Switch or move before the call if test is unstable | Move early if the site cannot pass the rehearsal |
| Best prep time | 10-15 minutes | 30-60 minutes | One full test block before the session |
Test stability, not just speed
A speed test can be useful, but it is not the whole truth.
For calls, you care about:
- upload, not just download
- latency and jitter
- whether performance changes during busy campground hours
- whether the signal holds when the laptop, camera, and call app are active
- whether the connection survives the full meeting, not just a 20-second test
If you use satellite, sky obstruction matters. If you use cellular, tower congestion and carrier coverage matter. If you use campground Wi-Fi, assume it may change when everyone else returns from hiking and starts streaming.
Use the internet backup planner and backup internet guide before treating one connection as the whole work plan.
Know the data and power cost of call days
Video platforms adapt bandwidth, so exact data use varies. But the official requirements from Zoom, Teams, and Meet all point to the same planning lesson: video calls are not background browsing.
A meeting-heavy day can also hold the whole office stack on for hours:
- laptop charging
- hotspot, router, booster, or Starlink
- external monitor
- task light
- headset or microphone
- fan or ventilation
- inverter overhead if the setup runs on AC
If Starlink Mini runs as the internet layer, its official average power draw is 25-40W. Over a four-hour call block, that is roughly 100-160Wh before laptop, router, monitor, and inverter losses.
Run the internet data usage calculator for meeting-heavy workdays and the remote-work power budget for the battery side.
Audio is the easiest professional upgrade
Clear audio usually matters more than a perfect camera.
RV audio problems often come from:
- roof fan noise
- furnace or air-conditioner cycling
- road noise in a parking-lot work stop
- clattering dishes or cabinet noise
- a laptop microphone too far from your voice
- echo from hard surfaces
A simple headset often beats an expensive camera in a small RV. It keeps your voice close to the mic, reduces room sound, and makes the call feel steadier even if the video quality shifts.
Light and background should be boring
You do not need a fake studio. You need fewer distractions.
Choose one or two call positions where:
- the face is not backlit by a bright window
- the screen does not force you into a bad working position
- the background is simple
- the workspace can be reset quickly
- noise sources are predictable
Lighting is also an ergonomic issue. If glare makes you lean, twist, or squint, the call position is costing you physically.
Pair this with the RV office setup guide and desk ergonomics guide if calls are a regular part of your workweek.
The one-hour preflight
For important meetings, use this one-hour routine:
- Test the primary connection from the actual call location.
- Start the laptop, camera, mic, and meeting app.
- Check battery state and charging path.
- Quiet fans, vents, and avoidable background noise.
- Set the light and background.
- Test the backup connection.
- Decide whether to stay, switch, or move.
The last item is the real value. If the primary connection is unstable one hour before the call, you still have options. If it fails five minutes before, your options are mostly stress.
Move before the meeting owns the decision
If a test call is unstable and the meeting matters, move early. A library, town parking spot, coworking day pass, or better campsite can be a better backup than troubleshooting from a bad site.
Example: a meeting-heavy RV workday
Suppose the day includes a 30-minute standup, a one-hour client call, and a two-hour workshop. That is not just "a few calls." It is a half-day where the internet stack, laptop, audio, lighting, and battery all need to behave together.
The safer workflow starts the night before:
- charge the laptop and headset
- confirm the primary internet plan has enough data
- save the backup connection
- choose the call position
- avoid parking where morning sun turns the screen into a mirror
On the morning of the calls, the first test should happen with the actual setup: camera on, microphone connected, hotspot or Starlink running, and the laptop in the place where the call will happen.
If the test stutters, do not spend the whole morning hoping the network improves. Switch to the backup, lower video quality, move to the stronger side of the rig, or relocate while there is still time.
The meeting-heavy day is where a repeatable process beats optimism.
Keep a graceful downgrade plan
A downgrade plan is not defeat. It is how you keep the meeting useful when conditions are imperfect.
Good downgrade options include:
- turn off incoming HD if the platform allows it
- turn your camera off when audio matters more
- use a phone dial-in for audio while keeping slides on the laptop
- pause cloud backups and nonessential syncing
- move from campground Wi-Fi to cellular or satellite
- reschedule video-heavy work for a better connection window when possible
This is also where the backup internet guide matters. A graceful downgrade works best when the backup has already been tested.
Know when the campsite is not a work site
Some campsites are excellent places to sleep and poor places to work.
That is not a personal failure or a gear failure. It is route information.
A campsite may be wrong for calls if:
- the only usable signal is outside in heat, wind, or noise
- the dish needs to sit where it creates a trip hazard
- the best cellular spot is too far from power
- generator hours conflict with the meeting block
- campground noise makes audio unreliable
- the backup location is too far away to use quickly
When that happens, treat the campsite as a base camp and move the work block elsewhere. A town library, day-use area with strong cellular service, coworking desk, or paid campground reset may protect the workday better than trying to force the scenic site to behave like an office.
The more important the call, the earlier that decision should happen.
When to turn video off
Sometimes the professional move is not forcing video.
Turn video off or reduce quality when:
- the upload is unstable
- the call is audio-first anyway
- the platform keeps adapting badly
- battery or data margin is tight
- the backup connection is lower-bandwidth
It is better to be clear and present on audio than frozen and garbled on video.
For client-facing calls, you can say plainly: "I'm switching to audio to keep the connection stable." That sounds more professional than pretending the frozen screen is not happening.
Final thought
Reliable RV video calls come from a repeatable process:
- test early
- keep audio clean
- budget power
- simplify the room
- know the backup
- move before panic
That process matters more than owning the fanciest internet gear.
Frequently asked
Questions RVers usually ask next.
How fast does internet need to be for RV video calls?
It depends on the platform, video quality, and meeting type, but stability and upload matter as much as raw download speed. Check the platform requirements and test from the actual campsite before a critical call.
Is Starlink or cellular better for RV video calls?
Either can be better depending on the site. Starlink can be strong in open-sky poor-cell areas, while cellular can be better under trees or near towns. The best setup is the one with a tested backup.
What is the easiest way to improve RV call quality?
Improve audio first. A simple headset or closer microphone often makes a bigger professional difference than a better camera, especially in a small RV with fans and hard surfaces.
When should I move locations before a call?
Move if the actual call setup fails a test one hour before an important meeting and the backup is not clearly better. Moving early is calmer than troubleshooting after the meeting starts.
Freshness note
Last checked April 21, 2026
This topic can change when products, plans, prices, campsite rules, or fit guidance move. These notes show what was reviewed most recently.
This review included
- Checked Zoom, Microsoft Teams, and Google Meet support documentation for current bandwidth and call-quality planning guidance.
- Checked Starlink Mini official specifications for satellite internet power-draw context during call blocks.
- Expanded the guide with a video-call preflight visual, official source grid, call-type comparison table, and a one-hour pre-call workflow.
Recent change log
April 21, 2026
Expanded the RV video-call guide with official platform checks, a preflight visual, call-type table, power examples, and fallback workflow.
April 17, 2026
Published video call guide for RVers with verified bandwidth requirements and current product pricing.
Broader editorial corrections are tracked on the Corrections and Updates page.
